Tonight I bottled the O Tannenbock Spruce ale. It is here where I appreciate brewing in 1-gallon batches, as I only had to sterilize 5 22-oz bottles. Clean-up was a breeze as well.
I never took a hydrometer reading, so I don't have a sense for the ABV. The overall flavor was quite sweet, perhaps due to the 3 oz of maple syrup used to prime the bottles. The spruce flavor was not apparent. If it's not great, I won't be wasting a large batch!!
Tasting the unfinished beer also made me ponder what Simcoe hops are. Apparently it is a relatively new (2000) American hop, from the Yakima Chief Ranches of Sunnyside WA. It has a very distinct aroma of citrus, grapefruit and pine and is likely a good complement to the spruce bough. It is mostly used as an aroma hop, but due to its low"alpha" acid cohumulone makes this a good bittering hop. Noble hops tend to have low cohumulone acids.

Tuesday, January 31, 2012

Sunday, January 29, 2012
Beer's Tasted - Old Fisherman's Ale
.JPG) Found a limited quantity ale from De Struise Brouwers in Belgium, called Pannepot, 2010 vintage. This quad ale had a rich, dark color and weighed in at about 10% ABV. With a malty nose, it is brewed with spices and tastes of burnt caramel and raisins with hints of honey and vanilla. A very good sipping ale that would pair well with sweet appetizers or desserts like creme brulee. Like many Belgian ales, it is not overly hoppy with its Bramling Cross, Hallaertau MF hops.
Found a limited quantity ale from De Struise Brouwers in Belgium, called Pannepot, 2010 vintage. This quad ale had a rich, dark color and weighed in at about 10% ABV. With a malty nose, it is brewed with spices and tastes of burnt caramel and raisins with hints of honey and vanilla. A very good sipping ale that would pair well with sweet appetizers or desserts like creme brulee. Like many Belgian ales, it is not overly hoppy with its Bramling Cross, Hallaertau MF hops. Beer Advocate had this to say about De Struise Brouwers..."Set up by two friends and a Brother-in-Law who started brewing beer in a barn at a local farm. Went commercial in 2003, but with no capital the beers were brewed on the Brasserie Caulier Plant. In February 2006, the decision was taken to move production to the Flemish SA Deca Brewery in Woesten-Vleteren (working) parts of which date from 1917. Exports its beers to Canada, Denmark, Italy and the USA with plans for China, India and Australia in the beerline."
Sunday, January 22, 2012
Spruce Boch
Thanks to Maureen, and the folks at the Brooklyn Brew Shop, I have a new approach to brewing -- fermenting in 1 gallon batches. The whole premise behind this method is that people who live in cities typically don't have the space for brewing in large, 5-gallon batches. I like this idea for several reasons:
The first 1-gallon batch I'm attempting is from the Brooklyn Brew Shop's Beer Making Book. This book has 52 seasonal recipes organized by Spring/Summer/Autumn/Winter. From the winter section, I decided to brew O Tannenbock Spruce Ale, a dark and piney beer inspired by our fore fathers who were rumored to have brewed with molasses and spruce. This recipe sounds like the perfect winter ale. I had to forage for the spruce sprig, worrying that our (still hanging) Christmas wreaths might have been treated with some preservative. I was able to find a sprig at the Presumpscot Elementary school.

The Mash
1 3/4 c water
1.5 lbs pale malt
0.1 lbs carapils malt
0.2 lbs flaked barley
60 minutes @ 152-degrees, sparge with a gallon of water @ 170-degrees. Recirculate the liquid through the grains once.
The Boil
0.12 oz Chinook hops, divided in half
0.04 oz Simcoe hops
1 six-inch long sprig of spruce
1/2 c molasses
Begin the boil. Once the foam subsides, add half the Chinook hops (I used pellets). Add remaining after 30 minutes, the Simcoe hops (I used dried flowers) after 50 minutes, and the spruce sprig after 55 minutes. At the 60 minutes mark, add the molasses and stir to dissolve. Cool to 70 degrees in an ice bath, about 30 minutes.
Pitch the Yeast
1/2 packet of English ale yeast, Safale S-04
This went into a 2-gallon plastic pail for the primary for a week, and into a 1-gallon glass jug for the secondary.
As I write this, I'm enjoying a Very Speciale Belge. A collaboration between Rob Tod of Allagash Brewing here in Portland, ME and De La Senne Brewing of Brussels. This is an excellent Belgian style that is somewhat non-traditional in that it has a fairly high hop rate. An A+ ale that I highly recommend, although the availability is limited.
Advice for the weekend, provided by my brother Jim. "Don't sweat the petty things, and don't pet the sweaty things."
- Fewer bottles to wash out, sanitize, fill and cap
- Less beer on-hand, especially when the batch was not so great or just plain tired of it
- I don't drink enough beer to go through 5-gallons (and most of my friends don't drink)
- Not as much heavy lifting

- Takes the same amount of time and equipment
- Have to use smaller amounts yeast and hops (I'm hoping to store and freeze these, respectively)
The first 1-gallon batch I'm attempting is from the Brooklyn Brew Shop's Beer Making Book. This book has 52 seasonal recipes organized by Spring/Summer/Autumn/Winter. From the winter section, I decided to brew O Tannenbock Spruce Ale, a dark and piney beer inspired by our fore fathers who were rumored to have brewed with molasses and spruce. This recipe sounds like the perfect winter ale. I had to forage for the spruce sprig, worrying that our (still hanging) Christmas wreaths might have been treated with some preservative. I was able to find a sprig at the Presumpscot Elementary school.

The Mash
1 3/4 c water
1.5 lbs pale malt
0.1 lbs carapils malt
0.2 lbs flaked barley
60 minutes @ 152-degrees, sparge with a gallon of water @ 170-degrees. Recirculate the liquid through the grains once.
.JPG) |
| Simcoe (L) and Chinook (R) |
0.12 oz Chinook hops, divided in half
0.04 oz Simcoe hops
1 six-inch long sprig of spruce
1/2 c molasses
Begin the boil. Once the foam subsides, add half the Chinook hops (I used pellets). Add remaining after 30 minutes, the Simcoe hops (I used dried flowers) after 50 minutes, and the spruce sprig after 55 minutes. At the 60 minutes mark, add the molasses and stir to dissolve. Cool to 70 degrees in an ice bath, about 30 minutes.
Pitch the Yeast
1/2 packet of English ale yeast, Safale S-04
.JPG) |
| Collaboration with Rob Tod of Allagash, Portland ME |
As I write this, I'm enjoying a Very Speciale Belge. A collaboration between Rob Tod of Allagash Brewing here in Portland, ME and De La Senne Brewing of Brussels. This is an excellent Belgian style that is somewhat non-traditional in that it has a fairly high hop rate. An A+ ale that I highly recommend, although the availability is limited.
Monday, May 9, 2011
IPA Failure & Success
It's been a busy couple of months working long hours and trying to get outside more with the arrival of spring here in Maine...finally! Since my last post, I have bottled, aged and consumed the Palilalia IPA. This brew has a deep copper color, a strong nose, a good solid head and has aged into a solid ale.

After aging in my basement for 4 weeks, I put a bottle in the refrigerator for the weekend. I opened, poured and tasted. My excitement quickly turned to disappointment. It had an off taste, and a long bitter finish. Something wasn't right and now I have 5 gallons of the stuff. What went wrong with my third batch of brew?
 Well, I decided not to react too quickly. I'd give it a couple more weeks in the cellar and perhaps that would help mellow thing out.
A week or so later, it dawned on me that when I was washing the first bottle out there were some particles stuck on the bottom. In fact, I had to rigorously shake water to clean it out fully. Maybe the bottle was contaminated!?! Ah ha! Let's get another bottle of this stuff in the refrigerator!
Bottle #2... same dark copper color, aroma and head. Looks and smells the same. But alas, it tastes better! In fact, it's pretty good! Hmmm... maybe all it not lost! Well, in fact we have enjoyed 4-5 bottles of the Palilalia IPA and it's a darn good ale! I really seemed to need the extra time 2-3 weeks in the cellar.
Final gravity was 1.012 and then I dropped my hydrometer and broke it :-(

After aging in my basement for 4 weeks, I put a bottle in the refrigerator for the weekend. I opened, poured and tasted. My excitement quickly turned to disappointment. It had an off taste, and a long bitter finish. Something wasn't right and now I have 5 gallons of the stuff. What went wrong with my third batch of brew?
 Well, I decided not to react too quickly. I'd give it a couple more weeks in the cellar and perhaps that would help mellow thing out.
A week or so later, it dawned on me that when I was washing the first bottle out there were some particles stuck on the bottom. In fact, I had to rigorously shake water to clean it out fully. Maybe the bottle was contaminated!?! Ah ha! Let's get another bottle of this stuff in the refrigerator!
Bottle #2... same dark copper color, aroma and head. Looks and smells the same. But alas, it tastes better! In fact, it's pretty good! Hmmm... maybe all it not lost! Well, in fact we have enjoyed 4-5 bottles of the Palilalia IPA and it's a darn good ale! I really seemed to need the extra time 2-3 weeks in the cellar.
Final gravity was 1.012 and then I dropped my hydrometer and broke it :-(
Saturday, March 19, 2011
Gypsum
I've been pondering the addition of gypsum in the IPA recipe. What is gypsum and why is it an important ingredient in this IPA?
Gypsum is also known as Calcium Sulfate (CaSO4), a common brewing "salt". It is a mineral that is quarried, and apparently was commonly mined in the districts around of Paris - hence the term "plaster of paris". Gypsum is deposited from lake and sea water, as well as from hot springs and volcanic vapors - a deep earth mineral.
 Who knew the uses of gypsum? It spans the gamut of foods, water treatment, soil amendment, and binder for things like cement and clay. And of course, gypsum is a key addition to gypsum board, or more commonly dry wall. In beer making, it is typically added to the mashing or boiling process. Gypsum cripes!!
Charlie Papazian has a good write-up in his book. In summary, the calcium (Ca) aids in the clarification of the wort and also helps to remove some of the tannins found in the husks of the grains. Apparently if these are not removed, the beer can be hazy and well as have an "off" flavor.
The sulfates (SO4) add a dry, crispness to the beer. Probably since this is an IPA, and that they tend to be drier, gypsum is added. Papazian warns that over mineralization can really ruin a beer. The type of brewing that I'm doing right now, where I'm leveraging malt extracts, I probably don't have to worry about adding minerals as it's probably already done in the malting process. However since I'm doing partial grain steeping, some consideration must be for the tannin proteins that can be imparted.
 I'll continue to follow recipes and add what they call for. Here in Portland, we are lucky to have high quality city water from Sebago Lake. It is a well-balanced water, neither too hard nor too soft.
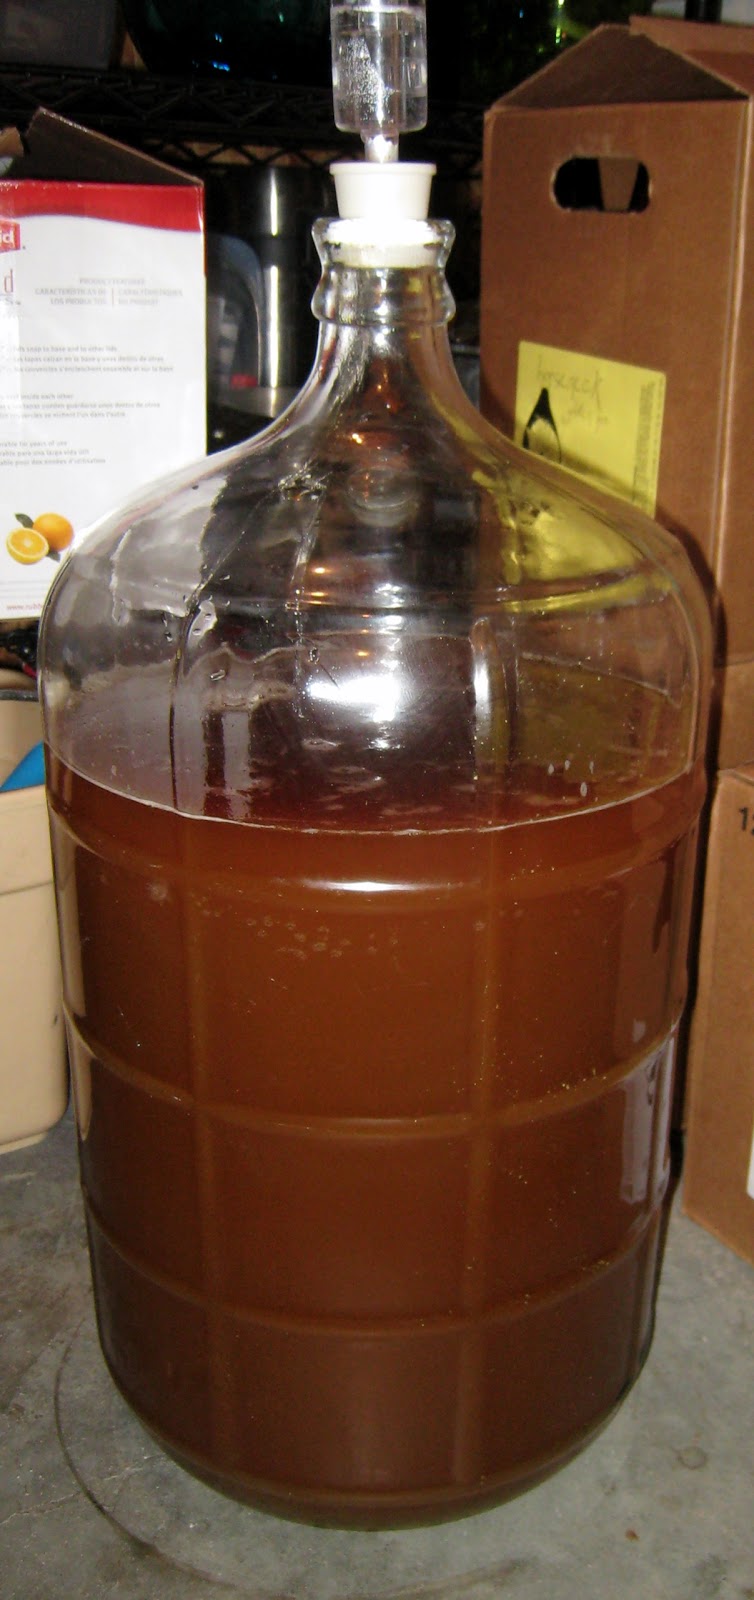
On Wednesday night, I transferred the beer from my primary fermenter (a.k.a. my white bucket) to the secondary fermenter the carboy. The foam, or kraussen, on the top was thick and viscous, while the brew itself had a heavy bread and hop aroma. The hop sediment was quite significant as well. It continues to ferment away in the carboy, and will probably do so for another week or so.
I also took a hydrometer reading, registering 1.022 gravity. The initial gravity prior to "pitching the yeast" was 1.042. Final gravity is supposed to be 1.014 - 1.018. I need to learn more about gravity readings with a hydrometer, and what they specifically mean. Perhaps my next post.
Stay tuned. Bottling in a week or so! The timing is good, since I'm down to my last two 22 oz. Bad Ass Mo Fo's (which I'm probably giving away to friends). My last friends to try the BA Mo Fo had RAVE reviews!!

Gypsum is also known as Calcium Sulfate (CaSO4), a common brewing "salt". It is a mineral that is quarried, and apparently was commonly mined in the districts around of Paris - hence the term "plaster of paris". Gypsum is deposited from lake and sea water, as well as from hot springs and volcanic vapors - a deep earth mineral.
Charlie Papazian has a good write-up in his book. In summary, the calcium (Ca) aids in the clarification of the wort and also helps to remove some of the tannins found in the husks of the grains. Apparently if these are not removed, the beer can be hazy and well as have an "off" flavor.
The sulfates (SO4) add a dry, crispness to the beer. Probably since this is an IPA, and that they tend to be drier, gypsum is added. Papazian warns that over mineralization can really ruin a beer. The type of brewing that I'm doing right now, where I'm leveraging malt extracts, I probably don't have to worry about adding minerals as it's probably already done in the malting process. However since I'm doing partial grain steeping, some consideration must be for the tannin proteins that can be imparted.
 I'll continue to follow recipes and add what they call for. Here in Portland, we are lucky to have high quality city water from Sebago Lake. It is a well-balanced water, neither too hard nor too soft.
On Wednesday night, I transferred the beer from my primary fermenter (a.k.a. my white bucket) to the secondary fermenter the carboy. The foam, or kraussen, on the top was thick and viscous, while the brew itself had a heavy bread and hop aroma. The hop sediment was quite significant as well. It continues to ferment away in the carboy, and will probably do so for another week or so.
I also took a hydrometer reading, registering 1.022 gravity. The initial gravity prior to "pitching the yeast" was 1.042. Final gravity is supposed to be 1.014 - 1.018. I need to learn more about gravity readings with a hydrometer, and what they specifically mean. Perhaps my next post.
Stay tuned. Bottling in a week or so! The timing is good, since I'm down to my last two 22 oz. Bad Ass Mo Fo's (which I'm probably giving away to friends). My last friends to try the BA Mo Fo had RAVE reviews!!

Saturday, March 12, 2011
Spent Grain Wheat Bread
 |
| Spent Grain Wheat Bread |
This bread has a medium crust and an excellent crumb. And you know what, it kinda tastes like beer.
Palilalia India Pale Ale
With the coming of spring, I decided it was time to dust off the brewing equipment again. My last brew, affectionately dubbed Bad Ass Mo Fo, served us well through the winter months. While I've been wanting to build the equipment for all-grain brewing, I just couldn't wait for me to "get it in gear" to figure all this out. The birds are singing, the sun is warmer -- it's time for something new, something fresh, something to wake us up from Maine's long winter!
 While historically I haven't been a heavily hopped-beer lover, recently I've begun to appreciate their boldness. After all, I do love bold flavors. Perhaps I should reclaim the adage of "there's no such thing as strong coffee, only weak people", and apply this to beer. Too, my neighbor John has turned me onto a couple excellent IPA's including Red Racer out of British Colombia and Maine's newest craft brew Stowaway IPA from the Baxter Brewing Co. What sealed my fate was enjoying a Big Twitch IPA from the Marshall Brewing Co., Belfast ME.
I turned to the grandfather of homebrewing, Charlie Papazian and the Complete Joy of Homebrewing, for ideas. I was intrigued by the Palilalia IPA, perhaps because I still can't pronounce the damn name or perhaps for the fact that he describes it as "not quite as dry as a traditional IPA but has plenty of character. The toasted malted barley lends a copper color and malty aroma". He doesn't include oak chips in the list of ingredients, but in the narrative he describes tossing in a handful of steamed oak chips during the fermentation, since IPA is often aged this way. Huh, didn't know that, which is why it's great to brew yourself. You get to really know what goes into the character of beer. Next time, I'll try the oak chips.
Ingredients for 5 Gallons:
5 1/2 lbs. of amber malt extract
1 lb. crystal malt
1/2 lb. toasted barley (my store has 40 or 60, I chose 60 - not sure what that means other than it will be a little darker)
2 tsp gypsum
2 oz Northern Brewer hops (boiling)
3/4 oz Cascade hops (finishing)
Ale yeast
3/4 c corn sugar
I had my local store crack the crystal malt and toasted barley. Placing in a mesh sack, these went into 1 1/2 gallons of cold water, then heated to 160-degrees to steep for 30 mins. I've started reading about the processes whereby enzymes convert proteins and starches into fermentable and non-fermentable sugars, and the effect of temperature, time, pH, etc. All very fascinating, and all I'm sure coming into play at this juncture of the process. I have a lot to learn.
After pulling out the grains, in went the malt extract, the gypsum and the boiling hops for 60 minutes of boiling. For the last minute of the boil, in went the finishing hops. I have to say, the house smelled quite amazing! The spent grains were cooled and set aside for Maureen's newest project - Spent Grain Wheat Bread - coming soon to Lick the Batter (if it turns out successful).
Guess I'm was a little out of practice since my last brewing project was on Halloween 2010. I struggled to have all my equipment properly sanitized at the right moment, racing to have the primary fermenter, strainer, et al at the ready. I certainly haven't used this much hops in past brewing projects as the strainer became somewhat clogged requiring me to stir the wort (oh wait, my spoon isn't sanitized!) through the strainer. Topping off the wort with additional cold water to the 5 gallon mark, down in the basement went the fermenter. The wort was at about 85-degrees, and took a couple hours to get to the sweet spot for "pitching the yeast", or 68- to 75-degrees. I pitched at 75-degrees. I snapped the cover on the fermenter, pushed in the air lock and proceeded to push the little black o-ring right through and into the bottom of the wort. Oy! After a few unsuccessful attempts to spoon it out, I resorted to black electrical tape to form a seal on the air lock.
It will be amazing if this brew doesn't become contaminated with all my sanitation snafu's.
After roughly 12 hours, there are few visible signs of active fermentation. I'm worried, but need to give it a full 24-36 hours. Keep your fingers cross with me!
This will ferment for up to 2 weeks. Papazian suggests that "because Palilalia's strength and high hop rate, this ale is best aged 3 to 4 weeks in the bottle before drinking". Cripes! Hope I can wait! I suppose that's when spring here in Maine may FINALLY arrive.

I turned to the grandfather of homebrewing, Charlie Papazian and the Complete Joy of Homebrewing, for ideas. I was intrigued by the Palilalia IPA, perhaps because I still can't pronounce the damn name or perhaps for the fact that he describes it as "not quite as dry as a traditional IPA but has plenty of character. The toasted malted barley lends a copper color and malty aroma". He doesn't include oak chips in the list of ingredients, but in the narrative he describes tossing in a handful of steamed oak chips during the fermentation, since IPA is often aged this way. Huh, didn't know that, which is why it's great to brew yourself. You get to really know what goes into the character of beer. Next time, I'll try the oak chips.
 |
| Crystal malt & roasted barley |
Ingredients for 5 Gallons:
5 1/2 lbs. of amber malt extract
1 lb. crystal malt
1/2 lb. toasted barley (my store has 40 or 60, I chose 60 - not sure what that means other than it will be a little darker)
2 tsp gypsum
2 oz Northern Brewer hops (boiling)
3/4 oz Cascade hops (finishing)
Ale yeast
3/4 c corn sugar
 |
| Grain bag |
 |
| Amber malt extract |
Guess I'm was a little out of practice since my last brewing project was on Halloween 2010. I struggled to have all my equipment properly sanitized at the right moment, racing to have the primary fermenter, strainer, et al at the ready. I certainly haven't used this much hops in past brewing projects as the strainer became somewhat clogged requiring me to stir the wort (oh wait, my spoon isn't sanitized!) through the strainer. Topping off the wort with additional cold water to the 5 gallon mark, down in the basement went the fermenter. The wort was at about 85-degrees, and took a couple hours to get to the sweet spot for "pitching the yeast", or 68- to 75-degrees. I pitched at 75-degrees. I snapped the cover on the fermenter, pushed in the air lock and proceeded to push the little black o-ring right through and into the bottom of the wort. Oy! After a few unsuccessful attempts to spoon it out, I resorted to black electrical tape to form a seal on the air lock.
It will be amazing if this brew doesn't become contaminated with all my sanitation snafu's.
After roughly 12 hours, there are few visible signs of active fermentation. I'm worried, but need to give it a full 24-36 hours. Keep your fingers cross with me!
This will ferment for up to 2 weeks. Papazian suggests that "because Palilalia's strength and high hop rate, this ale is best aged 3 to 4 weeks in the bottle before drinking". Cripes! Hope I can wait! I suppose that's when spring here in Maine may FINALLY arrive.
Subscribe to:
Posts (Atom)